
Organizing and managing photos is not an easy task, especially when you’ve got over thousands of photos on your system. keeping unwanted numbers in your library not only slow down the performance of your machine but also hogs the majority of storage space. However, de-cluttering your library manually takes forever to give you a tidy and well-organized library but surely you can get your work done in real time using the third party duplicate photo finder and remover tools.
In this post, we’re going to share how to manage and eliminate duplicate photos on your hard drive using the Duplicate Photos Fixer Pro. However, before going further let's understand what is Duplicate Photos Fixer Pro and why do you need this?
What Is Duplicate Photos Fixer Pro?
Duplicate Photos Fixer is an easy, fast and powerful software which is capable of managing and deleting duplicate photos from your entire computer. This ultimate photo fixing program ensure effective scan to find out replica photos and help you to eliminate more photo by using the similar matches and various matching level.Step 1: Download & install Duplicate Photos Fixer Pro
You can download and install the app from any browser just by typing the Duplicate Photos Fixer Pro in the address bar. You can easily get your hands on Duplicate Photos Fixer Pro from the App Store. You can also click on the link to download and install Duplicate Photos Fixer Pro directly on your Mac.
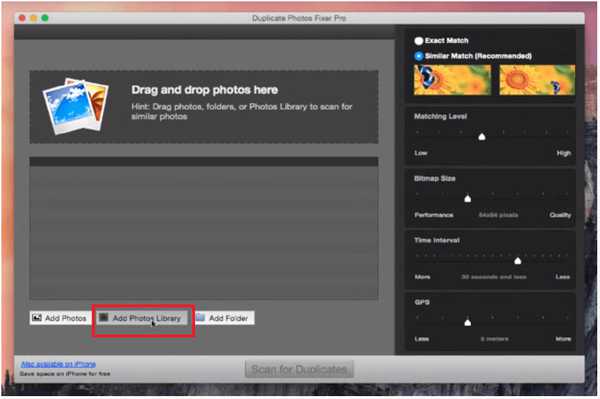
Step 2: Click On Add Photos Library
Now, you need to add your Photos library to find out how many duplicates you have in your Mac. If you have more than one photos library and you have duplicate photos in both the libraries, then you can scan both the library one by one. The app will not work effectively if you will add multiple libraries at the same time. You can add folder instead of any library as well.
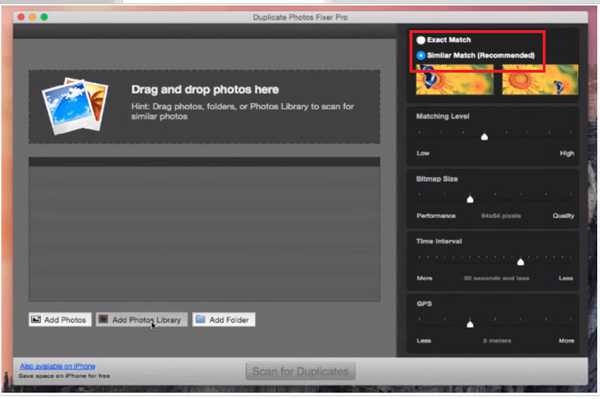
Step 3: Choose Similar Matches or Exact Matches
Duplicate Photos Fixer Pro provides two different ways to find out duplicate photos with Similar Matches and Exact Matches. Similar matches will help you to get more duplicate as compared to exact matches. It is capable of choosing the photos which are duplicate with the slight changes. Exact matches can bring up the duplicate which has exactly same content. if the image has slightly differed from another image then if fall under similar matches. Using the similar matches, you can find more duplicate and it is recommended by created of the app as well.
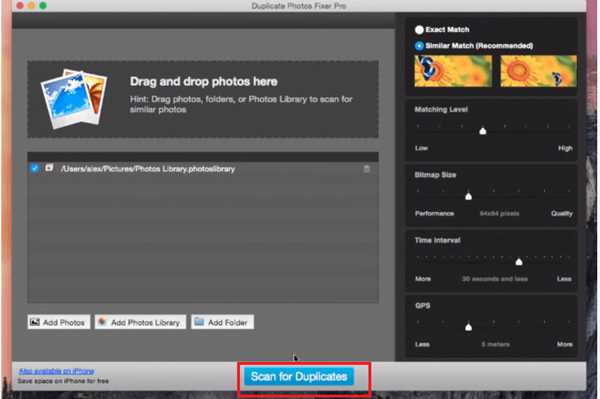
Step 4: Scan For Duplicates
Another step to finding and eliminate duplicate is clicking on the scan for duplicates. Once you will hit the scan for duplicate button then the app will start the scan to bring up all the duplicate you have in your machine. This option is available at the bottom of the Duplicate Photos Fixer Pro app.
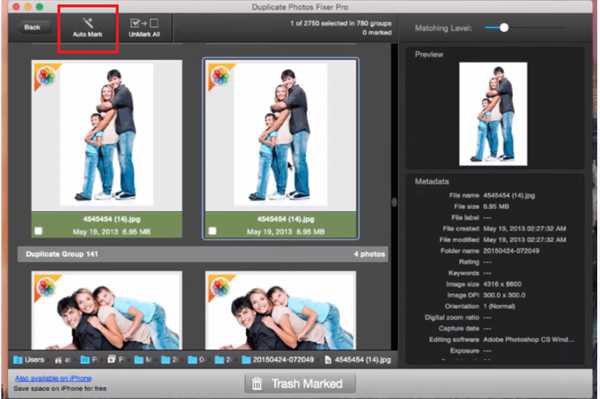
Step 5: Step 5: Click On Auto-Mark (It is optional)
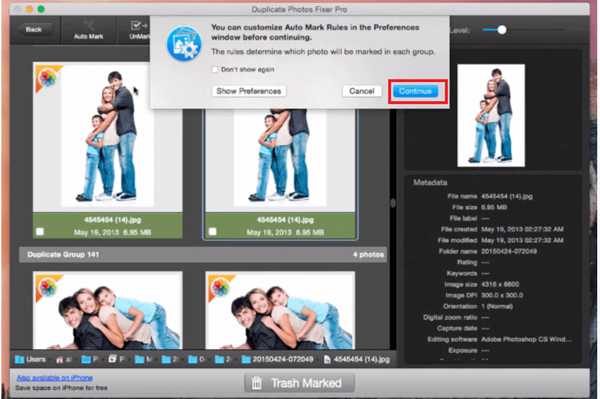
Using the auto-mark button is an optional way to eliminate the duplicate found by the scanning. It is a time-saving way to get rid of unwanted photos. Moreover, this method will help you to delete all the duplicate at once. However, you want to keep some of the photos and only interested in deleting a few photos then you can check-mark the photos manually to delete them.
If you’re deleting replica files manually then please keep in mind, the photos available in red color is duplicate photos and green color photos are original photos. You need to check-mark the red photos as these photos are with fewer resolutions.
Step 6: Use Trash-Marked
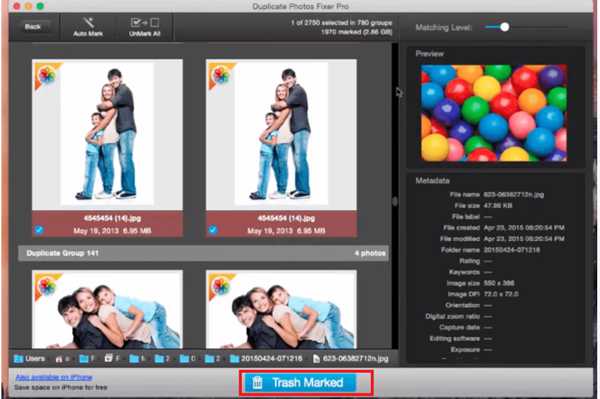
This option is to put all the replica files in the trash. However, before that, you need to follow some of the steps which you will get one by one. Please do not skip the instruction window as it is important to perform the steps to delete your replica files. Follow the below mentioned steps:
1. Firstly, you need to minimize the Duplicate Photos Fixer Pro and need to open your library at your machine. Now, you need to Show Sidebar.
2. Choose All Photos from the left-pane of your library.
3. Come back to Duplicate Photos Fixer Pro app and hit next, next and then continue.
Step 7: Open Duplicate Marked Photos
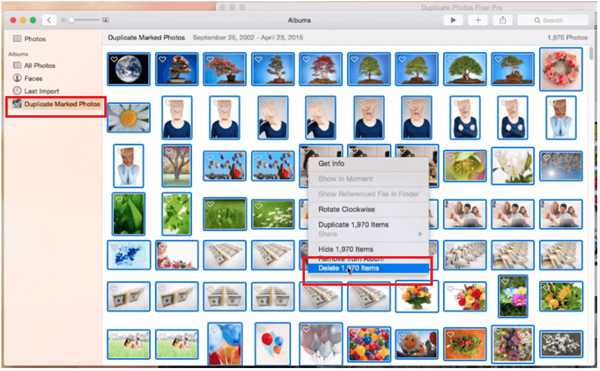
You need to open duplicate marked photos folder from left-pane of your library. You can locate all the duplicates under this folder. Now, select one photo and press command + A (to select all the photos) and delete them. That’s it, you’re done now.
Now you don’t need to waste your valuable time in manually deleting duplicate photos from your Mac. All you need to do is, download and install is a powerful tool to clear up replica photos and save some storage space.

0 comments:
Post a Comment