7 Tips For Choosing the Best Theme For Your WordPress Website

7 Tips For Choosing the Best Theme
At the moment, 27 percent of all internet is managed in WordPress, reasons why this is so being quite numerous. First of all, WP has one of the easiest learning curves out there. Second, there is a myriad of plugins you can use for each situation and finally, the number of themes available is simply staggering. Some of them are free while others require a humble fee to be paid before they can be used. Regardless, one thing that both of these groups have in common is a fact that they completely alter the visuals and the layout of your website. Seeing how this is a major issue, here are few things to look out for when choosing the best theme for your WordPress website.

1. Look For Responsiveness

In the world where there are more mobile than desktop users, you need a theme that is adjustable and responsive. Luckily, there is an easy way to check this. All you need to do is resize your browser screen and see if the layout adjusts to this new width. One of the strongest upsides of going with WordPress is a fact that most themes are quite responsive by default, however, trusting blindly in a theme you just discovered is never a good idea.

2. Check Browser Compatibility

Next thing you need to see is how compatible it is with different browsers. Sure, a theme may work flawlessly on Chrome, but what about the Firefox, Opera, Safari or Edge. How about users on older Microsoft operative systems who still use Internet Explorer. These are just some of the things you need to look out for. More importantly, you also need to check how your theme works with mobile versions of the aforementioned browsers.

3. Does It Support Your Plugins?

Earlier on, we already mentioned plugins as one of the WP’s winning traits. In fact, some websites are extremely plugin oriented, alas, not all themes offer support to all plugins. Whenever you are not sure about this, it is always for the best to simply ask a developer in order to find out. Seeing how you are at the same time pointing out a flaw in their software, you will provide them with an invaluable insight and therefore do a favor to both parties.

4. Does It Support Video

They sat that a picture can be worth a thousand words. Well, if this is true, by this analogy it would mean that a video is worth at least a million. In a world where 8 out of 10 users read only headlines, you need to find a more interactive, graphic and dynamic way to get a grip of their attention. What better method is there than using video? However, prior to resorting to this strategy, make sure that the theme you have chosen offers you a chance to edit and resize these videos adequately.

5. Inquire Into SEO Friendliness

Google’s ranking metrics are getting more and more complex. Factors like content and keywords have always had an impact on one’s search engine rank, but then things got out of hands. The abandonment rate and speed are these days just as big (if not bigger) and the choice of the theme matters as well. Because of this, you need to inquire into SEO friendliness of the theme you are about to use.

6. Insist On Customization

Regardless of what visual style you want to go with, it is unlikely that a vanilla version of the theme you choose will have everything that you need. Because of this, you need to insist on customization. This usually includes things such as sites design, layout, adding images and of course, incorporating your company’s logo. Seeing how WordPress is extremely beginner friendly platform, keep in mind that you will make most of these alterations on your own, so why not make it as simple as possible.

7. Look At Reviews

In the end, most of the above mentioned are not so easy to check before actually using the theme. In order not to make a mistake here, you may want to consult the opinions of others. All you need to do is look at the ratings and reviews of that particular theme left by other users. In this way, you can avoid making your own mistakes, by learning from the mistakes made by others.

Conclusion

When put in seven steps, choosing an adequate theme may seem as a lot of work. Luckily, things always seem much more complicated on paper. In fact, all of this can be checked in under an hour (even if you are extremely thorough), which means that you will have a new theme installed in no time. Naturally, seeing how the nuances are what will make you stand out when compared to the competition, you need to take the consideration the industry you are in, as well as your personal preferences. This last part, however, is both subjective and situational.

AUTHOR_NAMEAbout the Author:
Steven Clarke is a WordPress developer Sydney based expert. In his spare time, he likes to write about his ideas and share them with the world. Steven is a regular contributor to several websites.

10 Logo Design Principles That You Should Know

10 Logo Design Principles That You Should Know
To be the veteran in the logo designing field, there are certain sensitive parameters that are needed to be highly considered. Here we bring some of the world class logo principles that will bring out an excellent logo designer out of you.

1. Collect Necessary Design Outlines

A good designing starts with an excellent collection of requirements. A comprehensive design brief allows a developer to immediately start creating with all the plans, desires and expectations in hand.

2. Get A Comprehensive Knowledge Of Client’s Business

You can only portray the customer business if you have a complete understanding of his/her business. Research of clients industry allows you to design a logo that best conveys the business message smartly.

3. Prepare Blueprints Of The Logo Design

Make design sketches of all the initial ideas that come in your mind and come up with something innovative by inspiration sketching. This allows you to take out chunks from different sketches to create a whole new logo.

4. Make A Single Color, The Voice Of Your Brand

Colors are emotional and subjective. Don’t allow colors to blur the message of your logo. A single color of a logo can work with diversified requirements. A single color of your logo can help people to get used off it quickly, and the color will become your brand identity.

5. Take Care Of The Mathematics.

It is always a smart move to choose vectors based logo designing. Software’s such as Adobe Illustrator and Photoshop allows you to design your logo with all geometrical parameters such pixels, resolution, and definition in your hold.

6. Produce The Best Out Of Your Creative Mind

Do your homework in generating some great logo ideas. Once you come up with the smart list of logos, pick out the best one that you could present to the client for finalizing. Whether the customer appreciates your sketches, congratulations, you are already on the right path.

7. Offer A Preview Of Your Design

The application of a logo is diverse. It is imperative that logo design should be reviewed before to analyze that it will work perfectly for different graphical applications such as business stationery, vehicles, magazine cover, etc.

8. Keep It Simple & Loud

Adding unnecessary complexity can eventually end up in compromising your creativity. Keep it simple, expressive so that everyone could easily get used to it.

9. Make A Smart Color Choice

Selection of colors is one of the most key concerns a logo designer should be facing. Colors can dramatically support the message you intend to convey. Select colors that best goes with the tone of the design and message.

10. Reserve A Room for Flexibility

Once your mind is clear, and you have all of your aims in front you start proceeding, but always keep a room for flexibility. You never what changes you will need to make in future, what will make your client confused. Always consider that you may need to make alterations whenever required.

AUTHOR_NAMEAbout the Author:
Mark is a creative writer in LogoVenture, with an aim to provide high quality, informative and expressive articles. He keeps himself updated with all new trends to provide his readers an insights of the technological complexities.

What Is A Wide Area Network (WAN) and How Does It Work

What Is A Wide Area Network (WAN) and How Does It Work
By a Wide Area Network (WAN), it means a computer or telecommunications network that covers a large area geographically. Based on leased telecommunications circuits, Wide Area Networks are used by institutions to communicate across great distances. One of the best examples of a WAN is the internet. Even on the moon, there is the internet to exchange information.

A WAN differs from other network setups such as metropolitan area networks (MAN), local area networks (LAN), personal area networks (PAN) and campus area networks (CAN) which cover smaller areas. Among the firms most known for its exemplary WAN services is Software Defined WAN. Software Defined WAN serves large amounts of clients from across the world with great services on their list.

How WANs Work

A closer look at WANs reveals that they do not exist on their own like the other area networks. For example, a local area network covers a restricted geographical area such as an institution. In an urban setting, there are the metropolitan area networks that will cover the extent of the metropolis.

To create a Wide Area Network, these various types of area networks must link up to cover an increasingly wider area. To enable this communication, the networks must work together. If a university, for example, wants to create a link with another university across the globe, the two have to create a link between their servers and their individual local area networks.

Channels Used By WANs

A WAN can operate through various channels including radio wave transmission, telephone lines and fiber optics. Radio wave transmission works in the same way mobile phones work today. It is the best wireless communication at the moment with most communication taking place this way. The data transfer over radio waves has been tremendously improved as the time goes by. Circuit switched telephone lines are also commonly used between certain institutions over long distances.

The last option that of fiber optics, is one of the most used today. It allows the transfer of data between the greatest distances at the speed of light. Most firms are resorting to the use of fiber optics due to the fact that it is very reliable. It has the highest data speeds given that the speed of light is the highest ever recorded. The reliability of fiber optics has also made the cost of investing Wide Area Networks economically sound.

Types Of WANs

There exist many types of WANs including ATM machines, Dial-up networks, cable modems, DSL, Leased Line networks, ISDN, X.25, SONET and Software Defined WAN. Of all these, the most diverse one (and one you would like to use) is Software Defined WAN. It offers the fastest, most flexible and cost-effective form of communication between people and institutions no matter the distance. It automatically translates the language between communicating parties to give the users the ability to overcome language barriers. It has enabled many businesses to overcome barriers occasioned by distance and language.

How To Connect A Laptop Computer To A TV Using HDMI

How To Connect A Laptop Computer To A TV Using HDMI
There are many methods in which everyone could connect their laptop computer to their television nowadays. With most TV's being manufactured with HDMI connections, the problem most people find in knowing how to connect their laptop computer to their TV mistaken which cable method to choose. So, in order to simplify this process for you, here are basic methods in connecting your laptop computer to your television screen to allow you see your computer work through a bigger screen.

Connecting laptop computer to TV is basically very simple: all you need is the proper cable, that will enable you to set up the connection and you'll be watching content from your laptop on your television in less time. We'll take you through how to connect your laptop to a TV in this step-by-step method which HDMI connection. HDMI is one kind of connector and to know more about connectors you can visit sconect
.

HDMI Connection

High-Definition Multimedia Interface or (HDMI) is the best video and audio connection possible in today's technology for connecting a laptop to an HDMI-capable television. This type of connection is only possible if you have a TV HDMI connection. If you have a standard set classification TV, this option is not available to you. But, not commonly known is that your laptop must also be HDMI capable as well in order to transmit this type of signal to your TV. For the most part, HDMI cables tend to be more expensive than most connections - but the quality is far greater. If you have a USB cable, then using a USB to HDMI connection is possible.

Here is how to use an HDMI connection to connect your laptop to a TV so you can watch anything you wish to view on your laptop on your big TV screen. We'll also show you how to control your TV from your laptop.

There are two methods to this task: you can either mirror what is on your laptop's computer so that it displays on the TV, or set up the TV as a second screen, by extending your computer into a second display screen. In this article, we’ll explain step by step methods of connecting HDMI, as it is easy, and allows you to use your laptop as a control. (Imaging the content of your computer on your TV screen is a little difficult to set up because you need to set the best resolution for the TV with a workable resolution on the computer).

You'll need a laptop with an HDMI port and a TV with an HDMI input - basically, any TV will have one, but not all laptops have HDMI. Finally, you'll need an HDMI cable.

Any HDMI cable will work, one thing to consider, however, is that TVs have full-size HDMI inputs but not all laptops do.

Connect A Laptop Computer To A TV Using HDMI

1. Plug in the HDMI cable to the HDMI port at the back of the TV; notice the port you have plugged into. Then use your TV remote or the buttons on the frame scroll over the 'Inputs' until you get to the port. The screen should be blank.

2. Now you have to click on your laptop to send a signal down the HDMI port. In Windows, scroll into Control Panel and select 'Adjust screen resolution' from the list below 'Appearance and Personalization'. In the next screen, you will see two different displays. (If not, check that everything is physically connected properly).
If all is connected properly, you will be able to see different displays, one of which will be unable. This is the reason there is nothing to show on your TV screen. Using the laptop, click on the icon for the second monitor and select 'Extend the desktop onto this monitor'. Click 'Apply'. If it works you should now see a TV Windows image Windows desktop background picture on the TV. If not, don't panic - try again. Because for some reason, this process doesn't always work the first time.

3. Now you need to set the screen resolution of your second display on your laptop so that it looks bright on the TV. To do this simply selects the second display within 'Adjust screen resolution', and using the 'Resolution:' scroll-down; adjust the resolution until the desktop background images fit across the whole TV screen. What works best will depend on the aspect ratio and size of your TV, but you are aiming for 'high-definition', so start from the top and work down. You need a resolution not lower than 1280x720 to make this connection meaningful.

That's it, there are other inputs and options available to connect your computer to your TV, but HDMI is the cheapest, easiest, most commonly used options, and the image and sound quality are unbeatable.

DNS Probe Finished No Internet In Windows

DNS Probe Finished No Internet In Windows
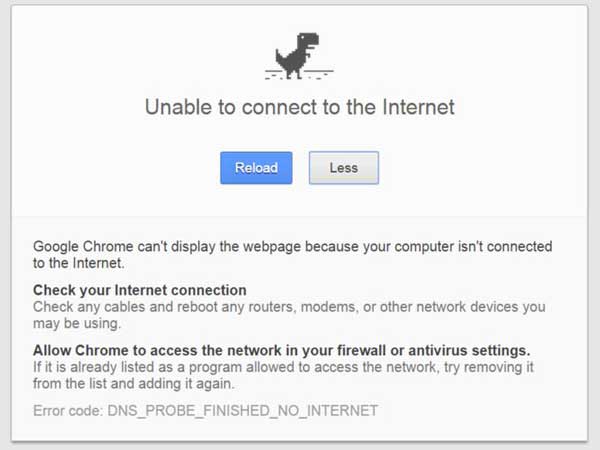
DNS probe finished no internet” is most common error seen in various versions of Windows. This error occurs in the system when a problem arises with the default DNS server or with firewall settings. As we all know, Domain Name System (DNS) is a thing related to the internet and it will translate domain names into IP addresses. If this error pops up, user cannot access the internet. If you have ever got this error and suffered a great deal to access the internet's then you are at the right place. We will share with you some effective ways to solve this error.

Check Your Browser

This is the most common reason for the DNS Probe error to pop up. You will need to change the default browser to the others in the list like Mozilla, Opera etc. If your internet is working fine on these browsers then it implies that your default browser Google Chrome is having a problem. If other browsers are also showing the same error then the problem is not with the browser.

If not the browser, then go check your firewall settings. You firewall may be behind this error. There are chances that the firewall is halting specific websites from loading, which leads to the blocking of that particular website and as a result the error occurs. So, before proceeding further, check with your firewall.

Change The Settings Of Your Modem/Router

If the above solutions did not work for you, then you need to check your router/modem. You need to restart your router and also unplug the power cable for a little while. After restarting, log in, go to system tools and click on reboot to reboot your router. If this is the reason behind the error, it will be solved instantly.
DNS Probe Finished No Internet In Windows

Command Prompt

Using command prompt to solve this error is like plug-and-play game. You can address this error by typing in the command prompt window ‘netsh Winsock reset’ and by clicking on enter.

Change IP Address

If the aforementioned method did not work to troubleshoot the error, then check this method. Change your IP address as it might be the culprit behind this error. To change the IP address follow the below steps:
  • Open command prompt window
  • Input ipconfig/release
  • Press enter
  • On completion of above process, input ipconfig/renew
  • Press enter
  • Input ipconfig/flushdns
  • Press enter
  • Restart the computer
The flushdns will flush the dns that is causing the error and gives way for proper connection.

Change DNS Address

You can also change DNS address. Below are the steps on how to change DNS address.
  • Click on the network icon on the taskbar
  • Click on network and sharing center
  • Click on LAN
  • A new window will pop up in which go to properties
  • Select ‘Internet Protocol Version 4′
  • Click on properties again
  • In newly opened window select ‘Use the following DNS server addresses’ button
  • In the DNS server box, input 67.222.222
  • In alternate DNS server box, input 208.67.220.220
  • Check the box ‘Validate settings upon exit’ and click ok
Users can also choose other ways like clearing the cache history, reinstalling the browser, uninstalling website filtering software, updating driver software etc to get rid of this error. Hope you get your work done.